Network Configuration
This guide describes the necessary steps for the ST-One Hardware® to connect to our system.
SUMMARY
1. Materials and Preparations
Before configuring the network, you will need the following items:
- Network settings (DHCP, STATIC IP) as per the permissions described in the article Communication;
- Username and password for the ST-One Hardware®: included in the "Getting Started" guide inside the ST-One Hardware® packaging.
2. Access the Interface
To configure the network, you will need to work with the "Interfaces" tab, where you will select whether the ST-One Hardware® will connect via Ethernet cable or Wi-Fi:
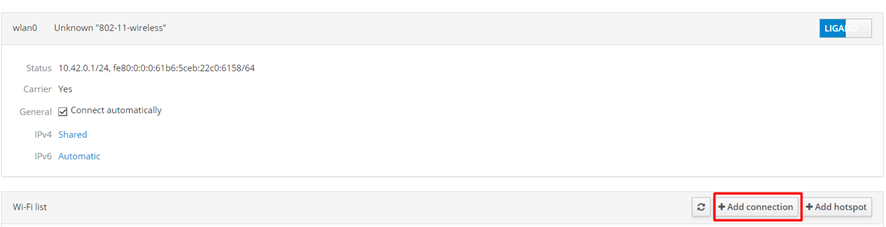
- The "Networking" tab displays and manages all network connections configured on the ST-One Hardware®.
- When accessing the Cockpit, you will have the "Networking" option. For more information, refer to the Cockpit article.
- In the "Networking" option of the Cockpit, you can see which interfaces are connected to the ST-One Hardware®, such as Ethernet cable, Wi-Fi network, 3G, Hotspot, etc.

2.1
In case of Wired Network:
a. Interface Identification:
- Click on the identified interface. By default, it is set as "Automatic (DHCP)" connection.
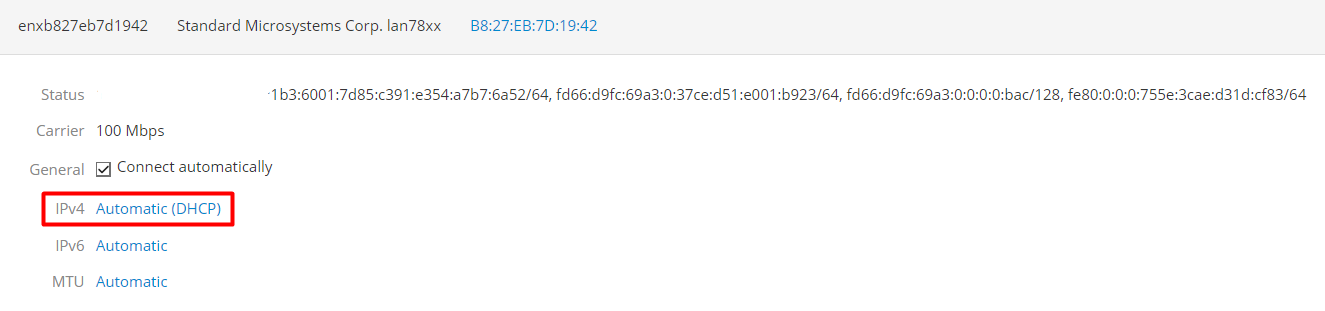
b. Change to Static IP
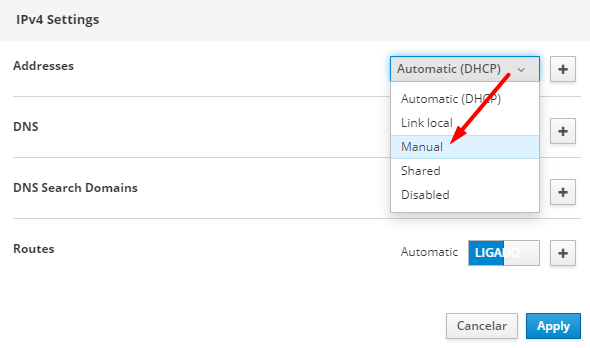
- If the network IP is not DHCP but a static IP, change the "DHCP" option to "Manual";
- Click on "Automatic (DHCP)" and select the "Manual" option.
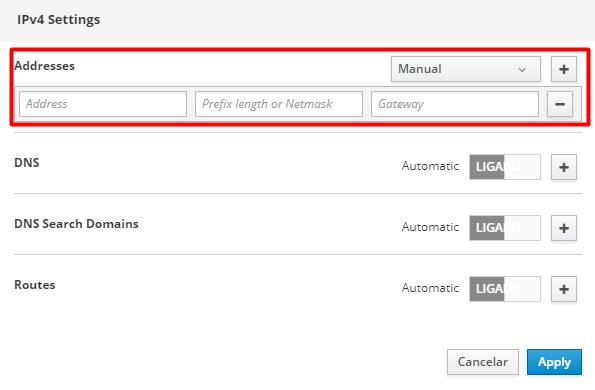
c. Insertion of Static IP:
- When selecting the "Manual" option, the fields to enter the static IP will be opened.
- Enter the IP and click "Apply". If necessary, confirm the IP change.
2.2
In case of Wi-Fi
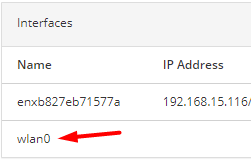
To connect to a Wi-Fi network, simply select the "wlan" interface.
a. Add Connection:
Click on the "wlan" interface and then click the "+Add Connection" button.
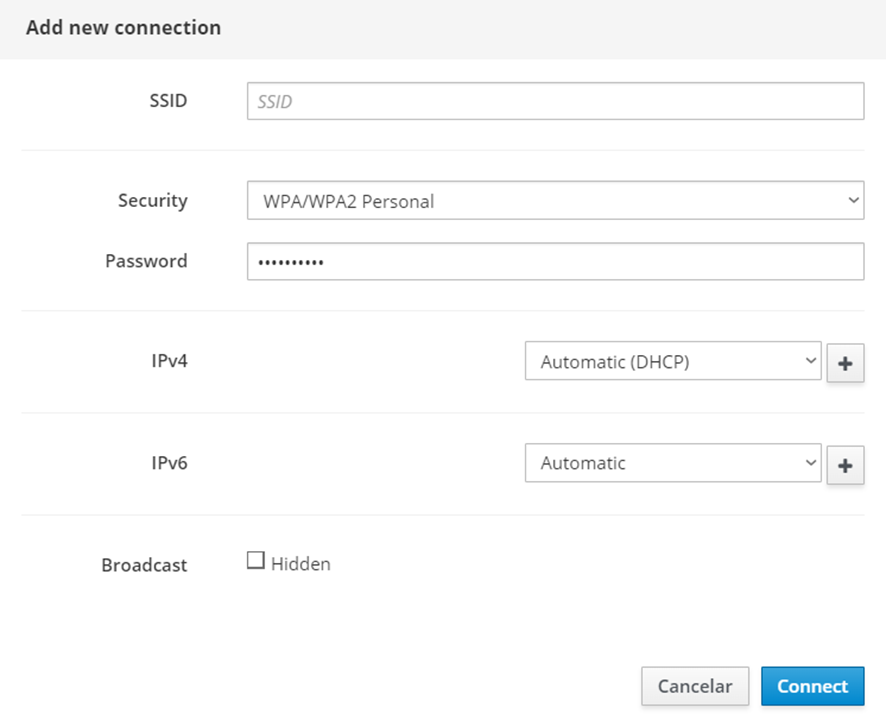
b. Configure the Wi-Fi Network:
Enter the Wi-Fi network information:
- SSID: name of the Wi-Fi network;
- Security: type of password encryption (by default, use WPA/WPA2 Personal);
- Password: Wi-Fi network password.
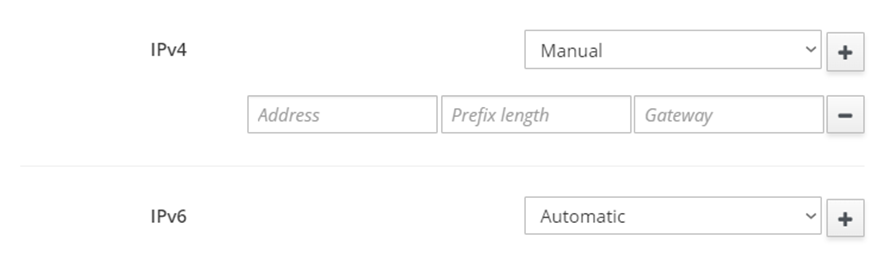
c. Configure Static IP (if necessary):
If the Wi-Fi network uses a static IP, change the "Automatic (DHCP)" option to "Manual". This will open the fields to enter the static IP.
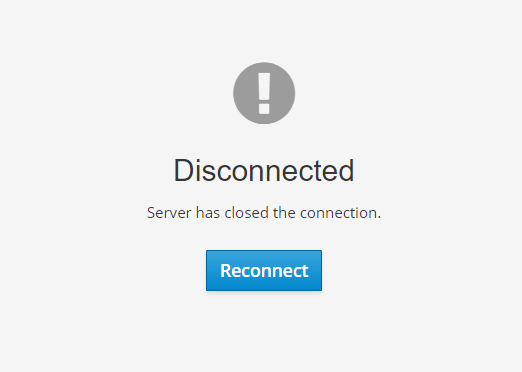
d. Connect to the Network:
Click the "Connect" button. If the connection is successful, the page will display the status as "Disconnected".
3. Equipment and Interfaces
Identify which interface will be used for the ST-One Hardware® to connect to the IT network.
| Equipment | Interfaces | Type |
|---|---|---|
| ST-One Hardware® | enxb827eb7d1942 | Ethernet cable |
| USB/Ethernet adapter | enx: MacAddress | Ethernet cable |
| ST-One Hardware® | wlan | Wi-Fi or Hotspot |
4. Configuring IT Network
4.1. Connection Test
To access the ST-One Hardware®, a computer or laptop connected to the same network is required.
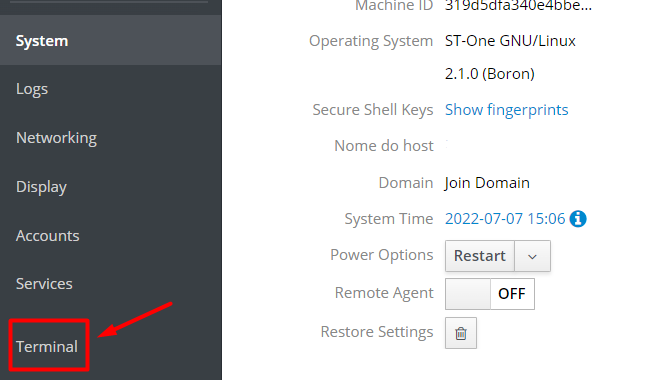
a. Access the Cockpit:
- In the Cockpit, go to the "Terminal" tab.
b. Test the Service Connection:
- In the "Terminal", enter the following commands to test the connection of the MQ services (data communication with the cloud service) and MC services (communication between the ST-One Hardware® and the monitoring services):
- netcat -zv -w 5 mq.st-one.io 8883
- netcat -zv -w 5 mc.st-one.io 443
- The commands should return the message "succeeded!" as shown in the images below. If not, proceed to the "Troubleshooting" section right below.


c. Contact for Data Digitization:
- If the return is "succeeded!", contact us via email providing the Serial Number of the installed ST-One Hardware® to proceed with the data digitization process:
- E-mail: support@st-one.io
4.2. Troubleshooting
Here are the errors that may occur when running the service test commands, along with their causes and solutions:
| Error Name | Cause | Mitigation |
|---|---|---|
| "mc.st-one.io" port 443: Temporary failure in name resolution | The DNS is unable to resolve the MC host address to the IP | Contact the network team to configure the DNS for the host mc.st-one.io to the IP 104.41.62.233 |
| "mq.st-one.io" port 8883: Temporary failure in name resolution | The DNS is unable to resolve the MQ host address to the IP | Contact the network team to configure the DNS for the host mq.st-one.io to the IP 134.209.44 |
- After the mitigation, run the test command again to check if the failure status has been resolved.
- If the return is "succeeded!", contact us via email providing the Serial Number of the installed ST-One Hardware® to proceed with the data digitization process.
If you have any questions, please contact support via:
support@st-one.io